To access the Directives module:
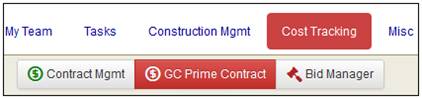
1. Click the GC Prime Contract button in the Cost Tracking tab.
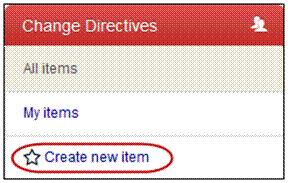
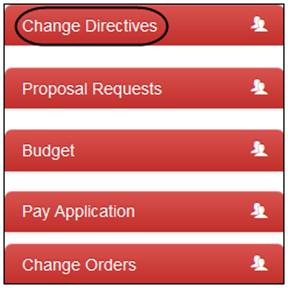
2. Select Change Directives in the left-side menu.
The Change Directives action options will display under the Change Directives thread name.
23. Construction Change Directives
You can create multiple types of directives within a single project. Each type of directive can have a different name as well as users with different rights. For example: Construction Change Directives can be originated by an architect, and Field Directives can be issued by a Contractor.
Please refer to Project Setup and Administration to setup user rights for the Directives application. The Directives module will not be shown until the initial setup is complete. |
To access the Directives module: 1. Click the GC Prime Contract button in the Cost Tracking tab. |
|
2. Select Change Directives in the left-side menu.
The Change Directives action options will display under the Change Directives thread name. |
|
To create a new Directive: 1. Click the Create new item link from the left-side menu. |
|
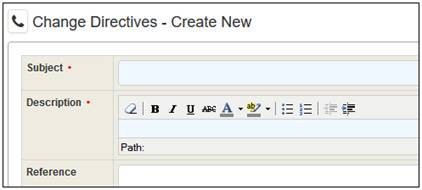
The Create New screen displays.
2. Enter the Subject and Description. 3. Optionally, you can enter Reference information. |
|
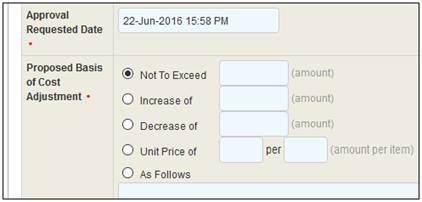
4. Review and update the Approval Requested Date. 5. Complete the Proposed Basis of Cost Adjustment section. |
|
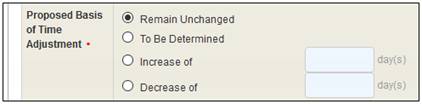
6. Complete the Proposed Basis of Time Adjustment section. |
|
7. Optionally, drag and drop any files to be attached to the Directive. |
|
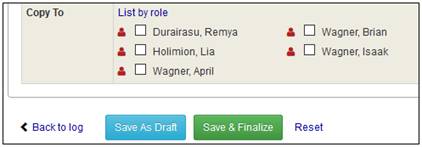
8. Optionally, select any users to be notified. 9. Click Save As Draft to finalize later or click Save & Finalize to complete.
Projectmates will notify users via email regarding the new Directive. If the Directive becomes overdue, Projectmates will send a friendly reminder to the responsible party. |
|
Viewing Directive Log & Detail
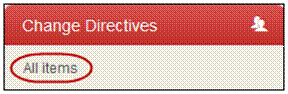
To view the Directive log, click the All Items link in the left-side menu. |
|
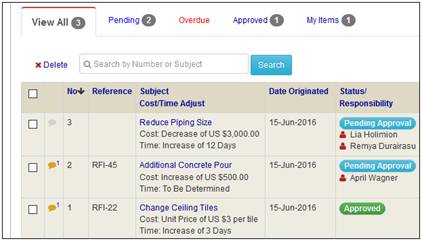
By default, the Directives are listed by number with the latest on top.
You can click the column headers to sort by other fields.
Also, you can click the different tabs at the top to select sub-sections of the list.
To locate a particular Directive, enter part of the number or subject in the Search by Number or Subject field. |
|
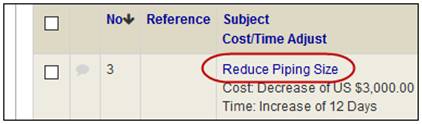
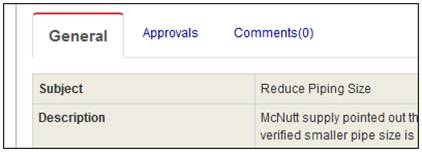
To view an existing Directive, click the Subject link in the Directive log. |
|
The Directive details page displays.
You can click the different tabs at the top to see different portions of the Directive details. |
|
To print a Directive details page or Directive log page: 1. Go to the screen that you want to print. 2. Use the |
|
The page will load in another tab in your browser.
3. Use your browser settings to print. |
|
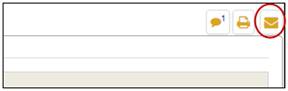
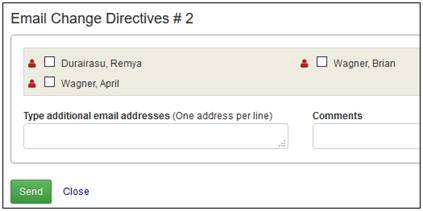
To send a Directive details page or Directives log page to another person: 1. Go to the screen you want to email. 2. Use the |
|
The send by email pop-up screen displays.
3. Select the users to receive the email. 4. Enter any additional email addresses to receive the email. 5. Enter any Comments to be included in the email. 6. Click the Send button. |
|
Directives - Email Notifications for New / Overdue Items
When a new Directive is created, Projectmates will notify selected users regarding the new Directive via email. Projectmates also sends a friendly email reminder to responsible users when Directives become overdue. |
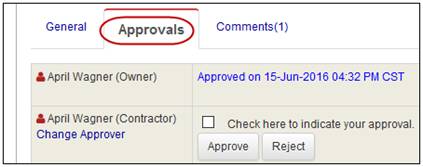
To respond to a Directive: 1. Click the Approvals tab from the Directive detail page. 2. Mark the check box next to your name. 3. Click the Approve button or the Reject button.
The status for this Directive will display as Approved or Rejected in the Directive log. |
|
Note: Once a Directive is approved by all users, it will no longer be editable. If necessary, comments can be added to Directives by clicking the Comments tab. |
If you created a new Directive in error, you can void the Directive. |
To void to a Directive, click the Void button from the Directive detail page. |
|
The status of the Directive will be changed to Voided. |
|