22. Finance & Budget – Prime Change Orders (CO)
Please refer to Project Setup and Administration to setup user rights for the Change Orders application. The CO module will not be shown until the initial setup is complete. |
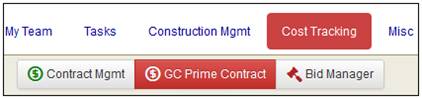
To access the Change Order module: 1. Click the GC Prime Contract button in the Cost Tracking tab. |
|
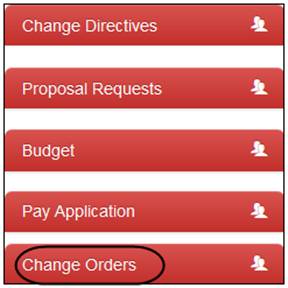
2. Select Change Orders in the left-side menu.
The Change Orders action options will display under the Proposal Request thread name. |
|
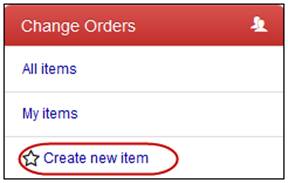
To create a new change order: 1. Click the Create new item link in the left-side menu.
The Change Orders – Create New Item screen displays. |
|
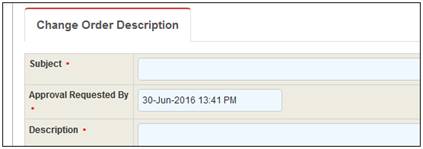
2. Complete the Subject field and Description field. 3. Change the Approval Requested By date if necessary. The default date is calculated from the initial setup. |
|
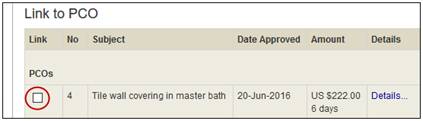
4. Optionally, link approved PCOs or Proposal Requests to this Change Order by marking the desired check box for the item. |
|
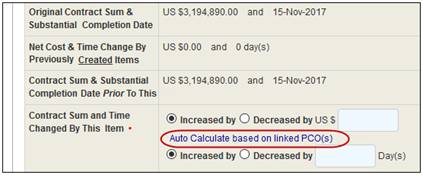
5. Review changes to contract sum and time: · Click the link to Auto Calculate based on linked PCO(s). · Manually adjust the changes to contract sum and time fields as necessary. |
|
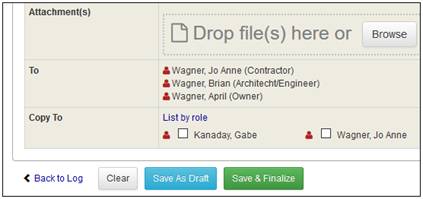
6. Optionally, drag and drop files in the Attachment box or click Browse or Choose Files to select files to upload. 7. Optionally, mark the check boxes for any users to be notified.
To complete and send notifications, click the Save & Finalize button. To finalize later, click the Save As Draft button. |
|
Note: If you receive an error message regarding the Orig. Substantial Completion Date or the Orig. Contract Sum, the Administrator must make project modifications prior to using the Change Order module. |
Note: All previous Change Orders must be approved by at least one person before a new Change Order can be created. |
Note: If the Change Order is not responded to in the requested date range, the system will generate an email to the responsible party, notifying them of the outstanding overdue status. |
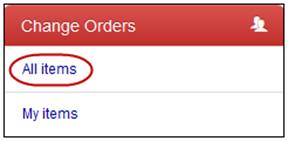
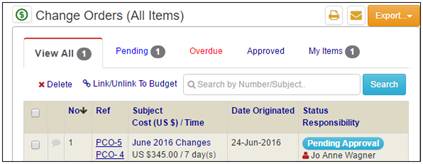
To view the Change Order log, click the All Items link in the left-side menu.
By default, the Change Orders are listed by number with the latest on top.
|
|
You can click the column headers to sort by other fields.
Also, you can click the different tabs at the top to select sub-sections of the list.
To locate a particular Change Order, enter part of the number or subject in the Search by Number/Subject field. |
|
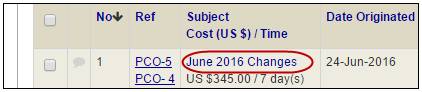
Viewing an Existing Change Order
To view an existing Change Order, click the Subject link in the Change Order log. |
|
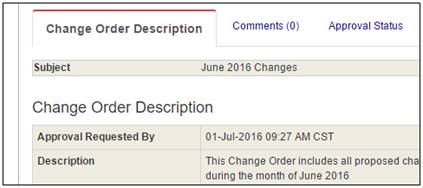
The Change Order details page displays.
You can click the different tabs at the top to see different portions of the Change Order details. |
|
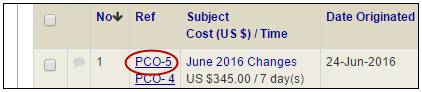
To view attached Proposal details, click the Ref link in the Change Order log.
The Proposal detail screen displays. |
|
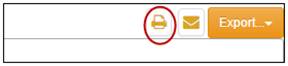
Printer Friendly Change Order
To print a Change Order or CO log: 1. Go to the screen that you want to print. 2. Click the |
|
The page will load in another tab in your browser.
3. Use your browser settings to print. |
|
COs - Email Notifications for New / Overdue Items
When a new Change Order is created, Projectmates will notify selected users regarding the new CO via email. Projectmates also sends a friendly email reminder to responsible users when Change Orders become overdue. |
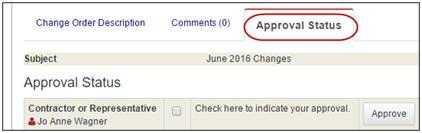
Responding to a Change Order
To respond to a Change Order, click the Approval Status tab from the CO detail page. |
|
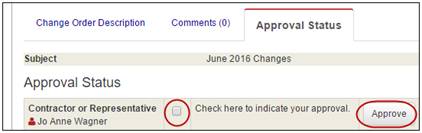
To approve the Change Order: 1. Mark the check box next to your name. 2. Click the Approve button.
After all approvals have been completed, the status for this CO will display as Approved in the CO log. |
|
To link a Change Order to the Budget: 1. From the Details page, click the Budget Link button. |
|
Or
2. From the Log page, mark the check box for the item you want to link to the budget and click the link to Link/Unlink To Budget. Note: Only link or unlink one item to the budget at a time. |
|
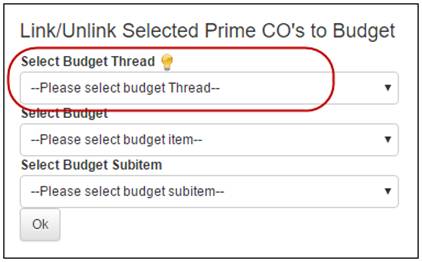
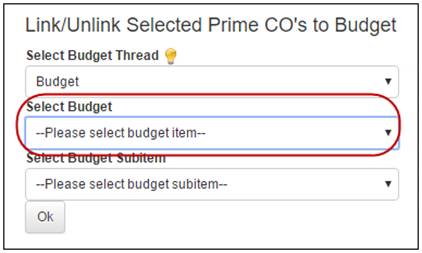
The Link/Unlink Selected Prime CO's to Budget pop-up displays.
3. Use the drop-down to Select Budget Thread. |
|
4. Use the next drop-down to Select the Budget Line Item or to create a new line item. |
|
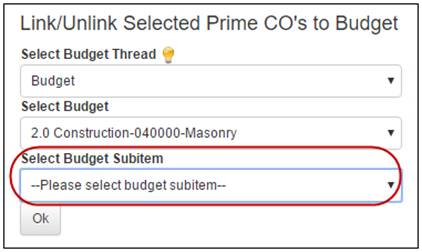
5. Use the last drop-down to Select Budget Subitem or to create a new one. 6. Click Ok to complete.
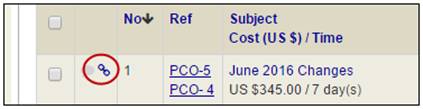
The pop-up automatically closes, and the log page refreshes to show the link icon. |
|
Note: You will know you have successfully linked the item to the budget when you see the link icon in the log page. Click the link icon to view the links pop-up. From here, you can view the budget where this item has been linked. |
|
Voiding a Change Order
If a Change Order was created in error, an Admin can void the Change Order. |
To void to a Change Order, click the Void button from the CO detail page. |
|
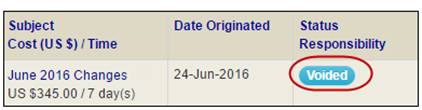
The status of the Change Order will be changed to Voided. |
|