17. Construction Workflow – Submittals
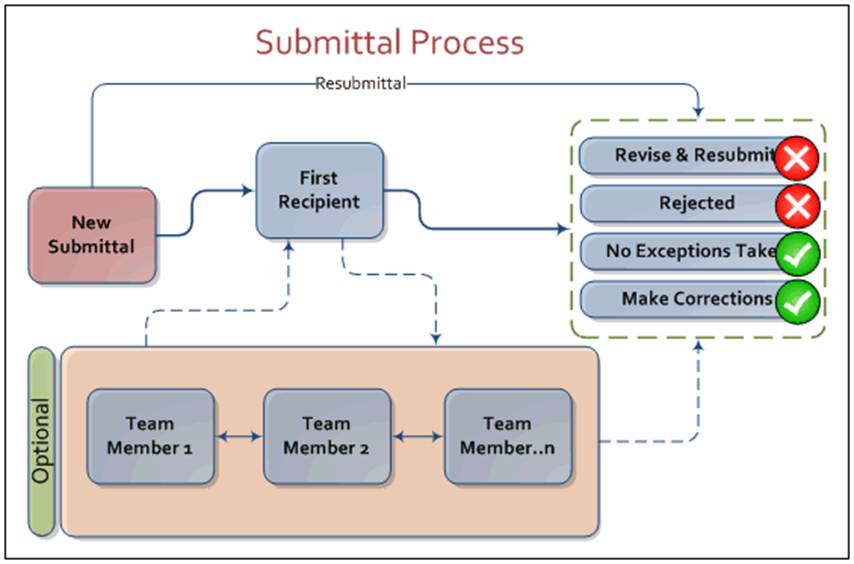
The Submittal process is a means by which design and construction details are reviewed and approved. Contractors can attach cut sheets, drawings, material safety data sheets, and other electronic files.
Submittal is a multi-threaded module. That means, you can create multiple groups (or threads) of Submittals. Each thread can have its own set of users, permissions, logic, etc. You can create threads such as Architectural Submittals, Steel Shop Drawings, etc.
There are two ways to use the Submittals application. One is to create new submittals as they are prepared and submitted. Optionally, you can prepare a list of submittals in advance. Then create new submittals based on the published list and track each line item from the prepared list.
Please refer to Project Setup and Administration to setup user rights for the Submittal application. The Submittal module will not be shown until the initial setup is complete. |
Watch the Submittals Training Video
Projectmates University offers several training videos to help on-board new users. To access the Submittals training video, look
for the |

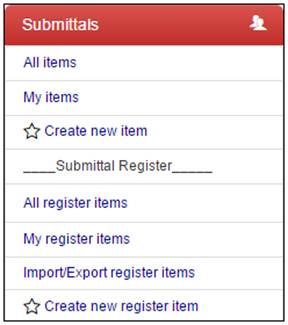
To get to the Submittal module,
click the Construction
Mgmt tab, and then click the |
|
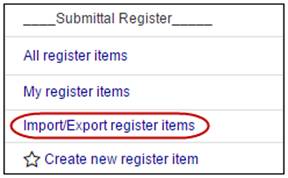
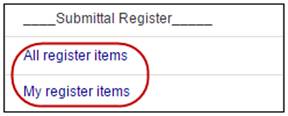
Click a thread name in the left-side menu to view the available action links.
All items and My items links will show different log views of the existing submittals.
All register items and My register items show the different log views of the Submittal Register, or the planned submittals. |
|
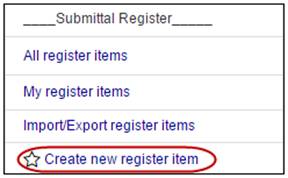
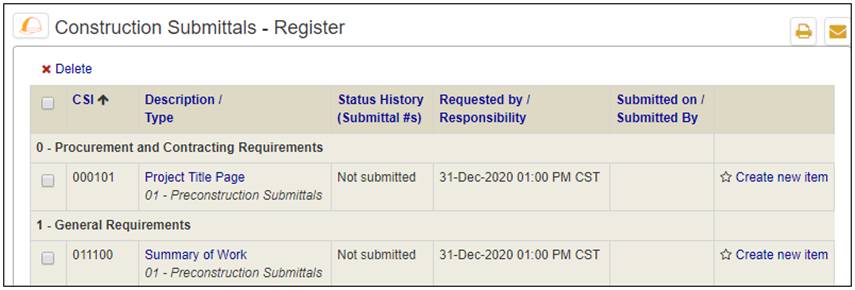
Preparing a Submittal Register
The Submittal Register is used to predefine all needed Submittals during a construction project.
To prepare a submittal register item: 1. Click the Create new register item link.
The Add New Register Item screen displays. |
|
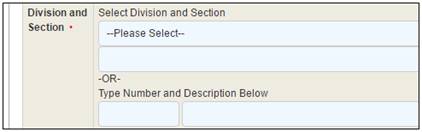
2. Use the drop-down lists to select a Division and Section. Alternatively, you can manually enter them. |
|
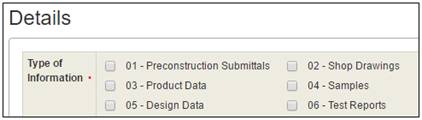
3. Mark the check box for the type of information required. Note: Marking more than one submittal type will create more than one register item. |
|
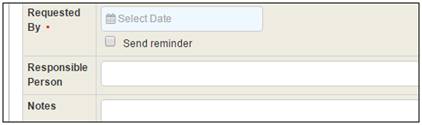
4. Click in the Requested By date field to open the date selector pop-up. 5. Optionally, mark the check box to Send Reminders. 6. Optionally, use the drop-down menu to determine the Responsible Person. 7. Optionally, enter any Notes. |
|
8. Click the Save button. |
|
Importing a Submittal Register from Excel
You can prepare a list of submittals in an Excel spreadsheet and import the spreadsheet to Projectmates' Submittal Register.
To import Submittal Register items: 1. Click the Import/Export register items link.
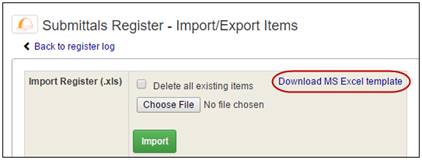
The Submittals Register – Import/Export Items page displays. |
|
2. Click the Download MS Excel template link. 3. Enter the Submittal Register items in Excel and save the file. Instructions are provided in the template. |
|
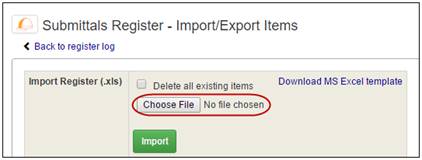
4. In Projectmates, click the Browse… or Choose File button to select the template you just created. Note: Mark the check box to delete existing items 5. Click the Import button. |
|
Viewing the Submittal Register Log
To view a log of the Submittal Register, click the All register items or the My register items link from the left-side menu.
A log of Submittal Register items displays. |
|
Creating New Submittals from the Submittal Register
To create a new submittal item from the submittal register: 1. Click the All register items or the My register items link from the left-side menu.
A log of Submittal Register items displays. |
|
2. Click the Create new item link next to the submittal register item for which you want to create a submittal. |
|
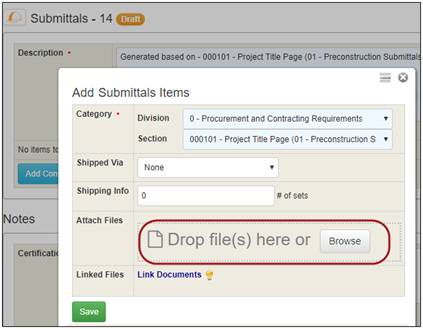
A new submittal item will be created with the Description pre-filled, and the Add Submittals Items pop-up will open with the Division and Section already selected.
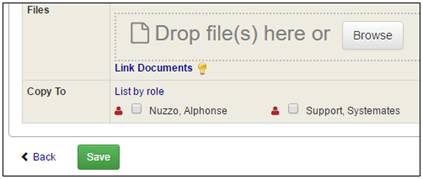
3. Optionally, select the Shipped Via method and enter the # of sets. 4. Optionally, drag and drop one or more submittal files. Alternatively, click Browse button to select files. 5. Optionally, use the Link Documents feature to link files already stored in Documents in this project. 6. Click Save and close the pop-up.
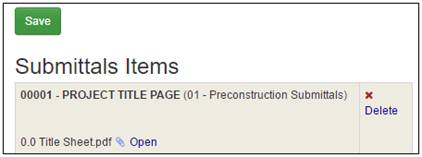
Submittal Items that you have attached will appear at the bottom of the pop-up under the Submittals Items header.
7. Skip to step 10 under the next title: Creating New Submittals. |
|
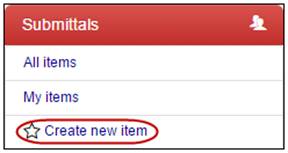
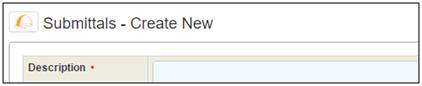
To create a new submittal item: 1. Click the Create new item link in the left-side menu.
The Submittals – Create New screen displays. |
|
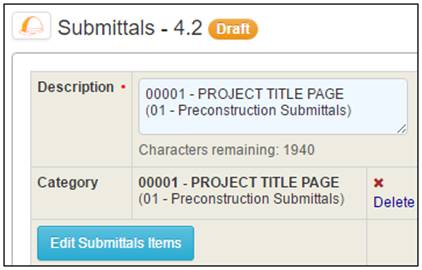
2. Enter the Description. |
|
3. Click the Add Submittals Items button.
The Add Submittals Items pop-up displays. |
|
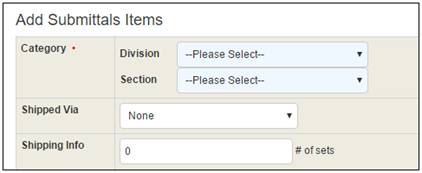
4. Select a Division and a Section from the drop-down lists. The type of submittal will be listed in parentheses. Note: These drop-down menu options are populated first by the Submittal Register. If there is no Submittal Register, then this is populated by the site defaults set up by the Site Administrator. 5. Optionally, select the method of delivery. 6. Optionally, enter the number of sets. |
|
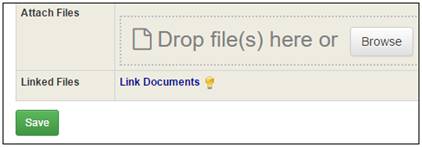
7. You can upload documents by clicking to open a selection window or drag and drop files. Alternatively, you can link the documents from the Document Management module. 8. Click the Save button. |
|
Submittal Items that you have attached will appear at the bottom of the pop-up under the Submittals Items header.
9. When you have
added all submittal items, click the Exit
|
|
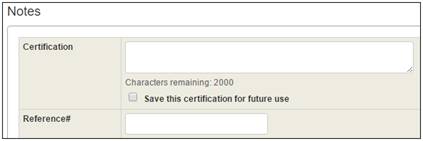
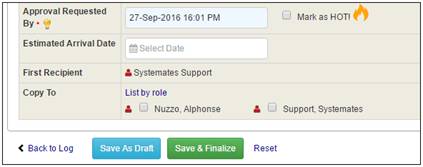
10. Enter the certification if required by your contract. 11. Optionally, mark the check box to use the same certification text for future submittals. 12. Optionally, enter a reference number. |
|
13. By default, the Approval Requested By date has been selected for you. You can change this if desired. 14. Select any Copy To users to be notified. 15. Click the Save as Draft button to finalize later or the Save & Finalize button to complete the submittal. |
|
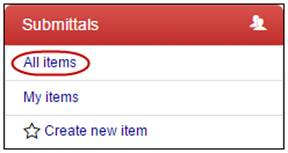
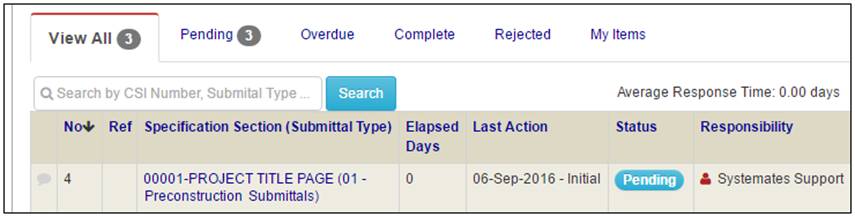
To view the submittal log, click the All items link in the left-side menu.
The submittal log screen displays. |
|
Submittals are automatically listed by number with the latest on top.
You can select different tabs across the top to view sub-sections of the log.
Also, you can click the column headings to sort the list by those columns. Toggle for ascending or descending order.
To locate a specific submittal, you can enter any part of the CSI number, submittal type or CSI description in the Search by CSI Number, Submittal Type or CSI Description field. |
Submittal information includes Product Classification, Notes, Submittal History, Final Action and any additional comments.
To view an existing submittal: 1. Click the All items link in the left-side menu.
The submittal log screen displays. |
|
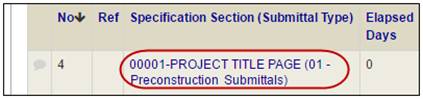
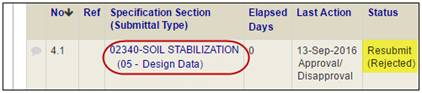
2. Click the specification section link.
The submittal detail screen displays. |
|
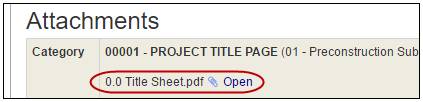
If the submittal has an attachment,
you will see the |
|
Emailing Notifications for New / Overdue Submittals
When a Submittal is entered into Projectmates, the system sends an email notification to the selected users. Projectmates sends a friendly email reminder to responsible users when submittals become overdue. |
You may want to delegate the Submittal or assign the Submittal to one of the users on the project by routing the Submittal. |
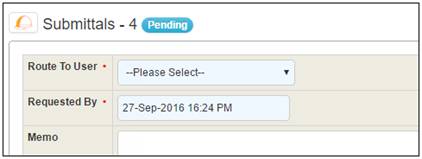
To route a submittal: 1. Open the Submittal Detail page by clicking the Specification Section link in the log. |
|
2. Click the Route button.
The route screen displays. |
|
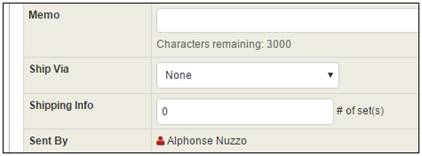
3. Select the Route To User from the drop-down list. 4. By default, the Requested By date has been selected for you. Make any necessary changes. 5. Optionally, enter a Memo for the user. |
|
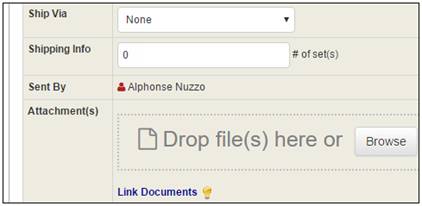
6. Optionally, select shipping method from drop-down. 7. Optionally, enter number of sets shipped. 8. Attach any files, if needed. |
|
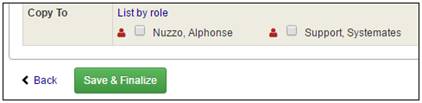
9. Select any additional recipients. 10. Click the Save & Finalize button.
Projectmates will send an email notification to the user announcing the routed Submittal. This routing will also be added in the Submittal History log. |
|
There are two ways to respond to a Submittal that has been routed to you. You can route the submittal to the user who routed it to you or another user. Alternatively, you can respond with a final action.
To route the Submittal again, follow the Routing a Submittal section, above.
To respond with a final action, read the next topic, Closing a Submittal. |
To close a submittal: 1. Open the Submittal Detail page by clicking the Specification Section link in the log. |
|
2. Click the Final Action button.
The Final Action screen displays. |
|
3. Select the Final Action from the drop-down menu. 4. Add a Disclaimer/Statement. 5. Click on the check box if you want to Save this certification for future use. |
|
6. Optionally, enter text in the Memo field. 7. Optionally, select the shipment method from the drop-down and enter the number of sets shipped. |
|
8. Add attachments if applicable. 9. Select any additional recipients to receive email notification. 10. Click to Save As Draft or Save & Finalize.
Note: The final response will be logged and the status of the Submittal will be changed to Complete. |
|
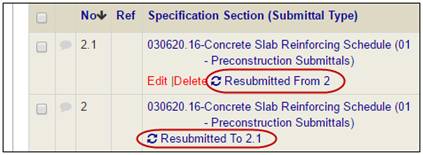
Any submittals that have been rejected can be resubmitted. To resubmit a submittal: 1. Click the Specification Section link to see the Submittal detail page. |
|
2. Click the Resubmit button at the bottom of the page. |
|
The screen will load with most information from the original submittal already entered.
Tip: Be aware, file attachments are not automatically loaded from the original submittal.
3. Enter any new information regarding this submittal. |
|
4. Click the Save As Draft button to finalize later. 5. Alternatively, click the Save & Finalize button to finalize now. |
|
After the submittal is resubmitted, both the original submittal and new submittal records will reference each other (i.e. the rejected submittal will contain the new submittal number and vice versa.) |
|
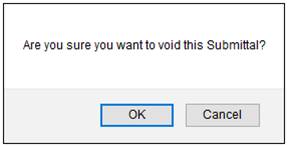
If a submittal has been created in error, you can void the submittal.
To void a submittal: 1. Click the Specification Section link. |
|
2. Click the Void button. |
|
3. Confirm the action when prompted.
Once voided, a submittal cannot be changed or reverted back.
The status of the Submittal will be changed to Voided. Note: You must have Administrative rights to void a submittal. |
|
Printing Submittals and Transmittals
To print a submittal or submittal log: 1. Go to the screen that you want to print. 2. Use the |
|
The page will load in another tab in your browser. 3. Use your browser settings to print. |
|
To print a transmittal form: 1. Open the details page for the submittal. |
|
2. Half-way down the page on the right, click the Transmittal link. |

A transmittal form will open as an Excel spreadsheet with details from the submittal already filled out for you. 3. Make any necessary changes and print the form. |