The Action List module efficiently serves as a reminder to project participants regarding their tasks and task completion dates. This tool allows you to create issue lists and monitor incomplete items. The tool also allows users with appropriate rights to verify issues and mark them as complete.
The Action List is a multi-threaded tool. In other words, multiple independent Action Lists can be maintained with a varying degree of user privileges. For example, a contractor can keep his/her Action List of items that need to be addressed by subcontractors. An architect can maintain his/her separate Action List that needs to be addressed by the contractor. The Architect can have rights to view contractor's list but cannot modify it and vice versa. Note: Action Lists cannot be accessed until initial setup is complete. Contact your project administrator to setup the lists and grant appropriate rights to users. |
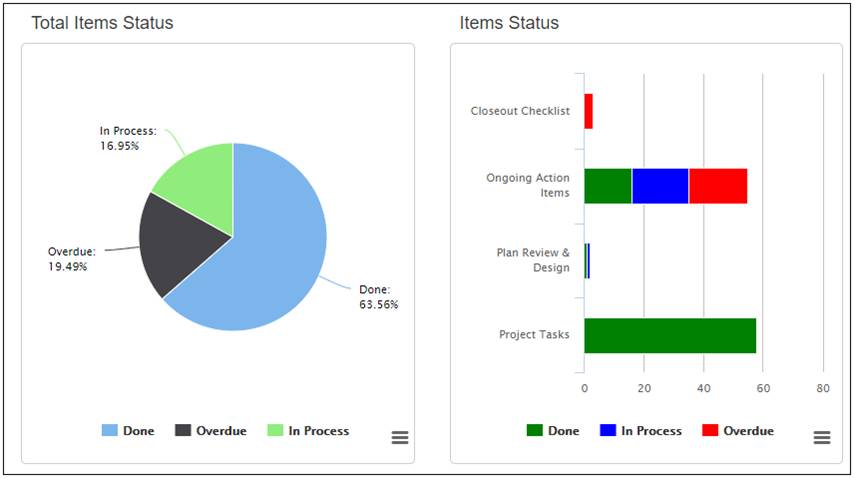
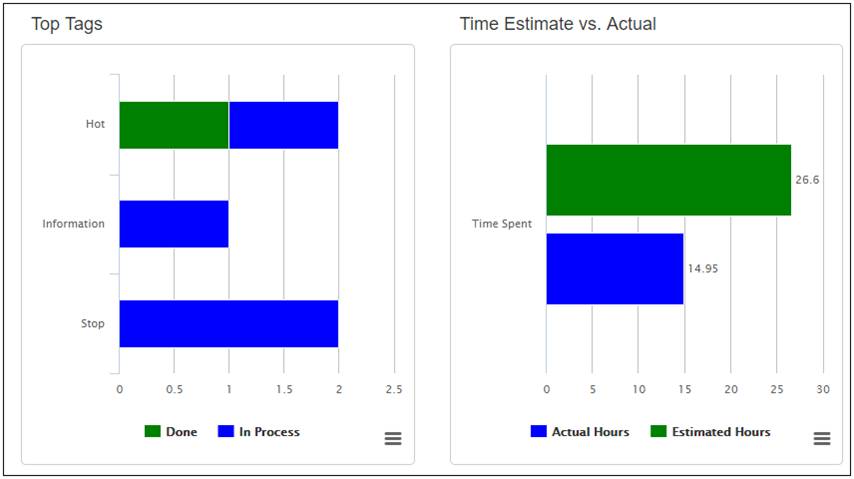
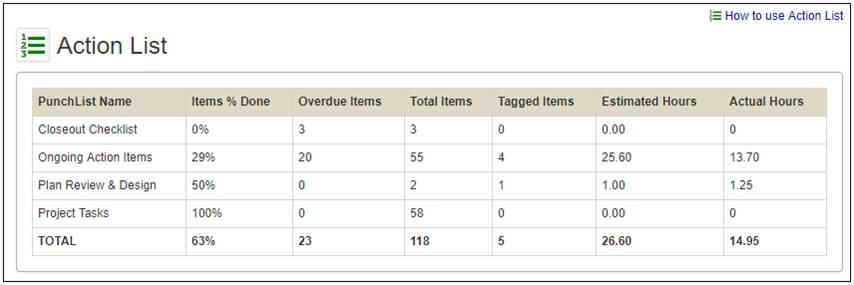
The Action List Mini Report displays a summary of all Action List Threads the user has rights to view.
Watch the Action List Training Video
Projectmates University offers several training videos to help on-board new users.
To access the Action List training video, look for
the ![]() Video
icon.
Video
icon.

Once the project administrator has configured the thread and granted permissions, you can change the custom Group 1, Group 2 and Tag options.
Group Names are used for organizing items, such as Rooms, Floors, Drawings, Disciplines, Sub-Contractors, etc.
The Project Administrator determines the naming convention for the Group 1 and Group 2 categories. For example, a typical construction punchlist might use Rooms and Disciplines for Group 1 and Group 2, respectively. |
Managing Group 1 and Group 2 Data
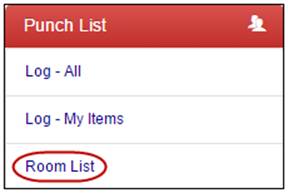
To add Rooms or Group 1 data: 1. Click the Room List link from the left-side menu. |
|
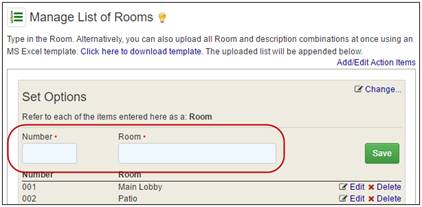
2. Enter a numerical value in the Number field. 3. Enter a description in the Room field. 4. Click the Save button.
The room will show up in the list below.
To edit an existing room: 1. Click the Edit link beside the room that you want to edit. |
|
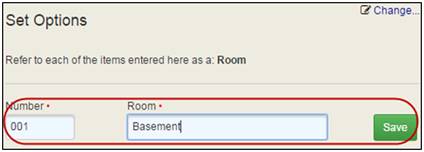
The room information will appear above the current list for editing.
2. Make the necessary changes. 3. Click the Save button. |
|
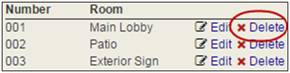
To remove a room from the list, click the Delete link beside the room. Note: Removing a room from this list will erase any Action List items associated with the room. |
|
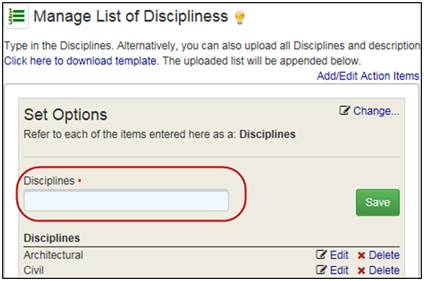
To add Disciplines or Group 2 data: 1. Click the List of Disciplines link from the left-side menu. 2. Enter a description of the discipline. 3. Click the Save button.
The discipline will now be added to the list below.
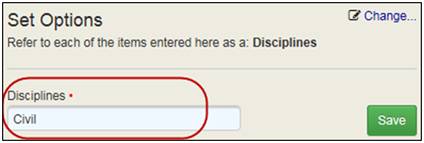
To edit an existing discipline: 1. Click the Edit link beside the discipline that you want to edit. |
|
The discipline information will appear above the current list for editing.
2. Make the necessary changes. 3. Click the Save button. |
|
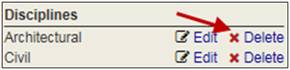
To remove a discipline from the list, click the Delete link beside the discipline. |
|
Note: Removing a discipline from this list will erase any Action List items associated with the discipline. Note: The primary difference between Group 1 (list of Rooms) and Group 2 (List of Disciplines) is that Group 1 allows numerical identification for each item. |
Importing and Exporting Group 1 and Group 2 Values
Both Group 1 and Group 2 data can be imported using an Excel template file provided in the import section. |
To import either Group 1 or Group 2 data: 1. Click the List of Rooms or List of Disciplines link from the left-side menu. |
|
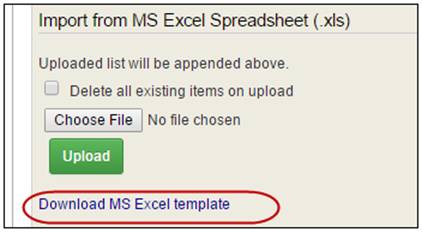
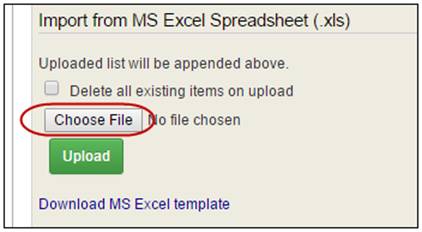
Beneath any existing rooms or disciplines is the Import/Export section.
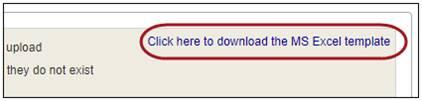
2. Click to Download MS Excel template. 3. Update the template file to include the necessary information. |
|
4. In Projectmates, click the Browse… or Choose File button to select the template file that you just created. Note: To replace any existing room or discipline information, click the check box for Delete all existing items on upload. Also note, this action will remove any existing tasks in the Action List. 5. Click the Upload button.
The newly imported data will appear in the list of rooms or disciplines. |
|
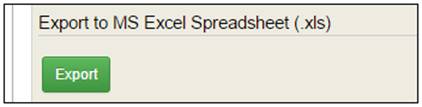
To export the list of group 1 or group 2 values, click the Export button. |
|
Tags are a method of graphically flagging the status or required action for an item. Tag functionality is optional and is determined by those with permissions to change Settings. By default, Tags are not enabled for use.
There are two options for enabling Tags. The first option is to allow users to select tags from a predefined list. The second option is to allow users to create their own custom tags as they use the Action List module.
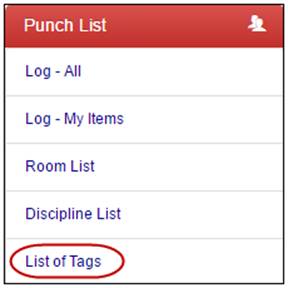
To activate tags: 1. Click the List of Tags link in the left-side menu. |
|
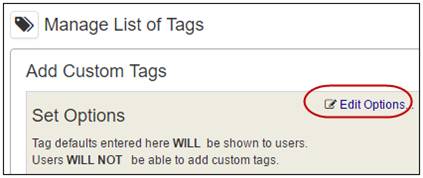
2. Click the Edit Options… link. |
|
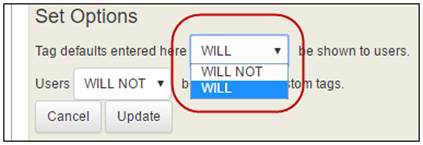
3. Use the drop-down menu to change the Will Not setting for either tag option or both. 4. Click the Update button. |
|
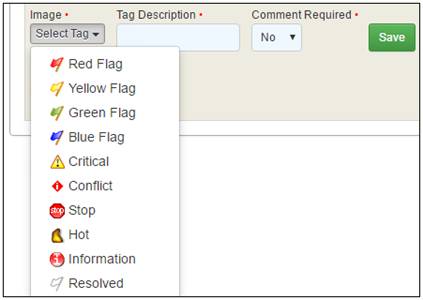
To create a list of predefined tags: 1. Select a tag from the image drop-down box. 2. Enter a description for the tag.
Note: Optionally, you can change the drop-down menu to require a comment when this tag is used. For example, if a Critical Action tag is created, documentation may be required to further clarify this tagged status.
3. Click the Save button.
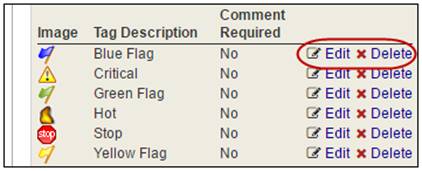
The new tag will appear in the list. |
|
To modify a tag, click the Edit link and follow the prompts.
To remove a tag, click the Delete link. |
|
Import/Export Action List Items
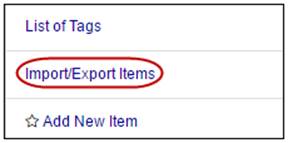
To import Action List items: 1. Click the Import/Export Items link in the left-side menu. |
|
2. Click the link to download the template file. 3. Enter the necessary information into the template file and save the file. |
|
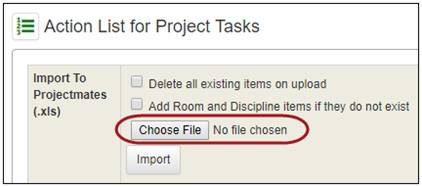
4. In Projectmates, click the Browse… or Choose File button to select the template file you just created.
Note: To replace all the items in this Action List, mark the check box for Delete all existing items on upload. Note: To create any Group 1 or Group 2 items that are in your template and that do not already exist in this Action List thread, mark the check box for Add Room and Discipline items if they do not exist. 5. Click the Import button. |
|
Add New Action List Items
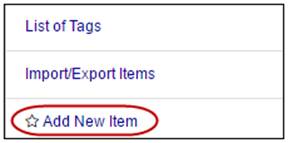
To add new Action List items: 1. Click on the desired Action List thread that appears in the left-side menu. 2. Click the Add New Item link. |
|
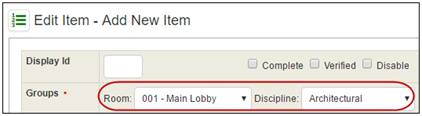
The Edit Item – Add New Item screen will display.
3. Use the drop-down boxes to select Room and Discipline. Note: To change the sorted order, enter the desired Display Id. Items will be ordered numerically by this number. |
|
4. Enter description of the Action Item. |
|
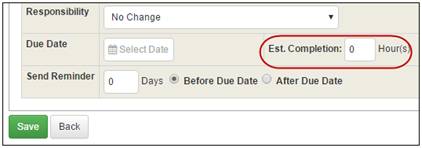
5. Optionally, you can set the Responsibility, Due Date, and Send Reminder settings. Note: By assigning a responsibility, this item will be placed in that user's Ball-in-Court. Note: A reminder will not be sent if an action item is completed before the reminder date. 6. Optionally, enter the expected amount of time the task should take in the Estimated Completion field. |
|
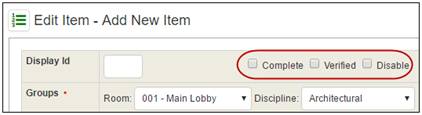
7. Optionally, mark an item Complete or Verified. 8. Optionally, mark the check box to disable the Action List item. Note: Disabling will inactivate the Complete/Verify Options and the task will not be included in Projectmates reports. |
|
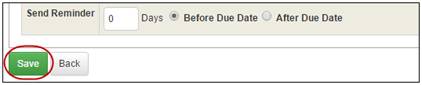
9. Click the Save button. |
|
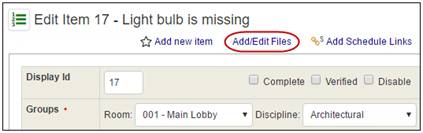
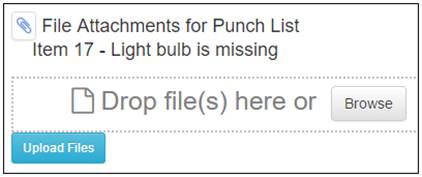
Once the item is saved, you will see the Add/Edit Files option.
To attach files related to this item: 1. Click the Add/Edit Files link. |
|
The file attachment pop-up will appear with the attachment box.
2. You can drag
and drop one or more files on to the File Attachment pop-up. 3. Click Upload Files to save the files. |
|
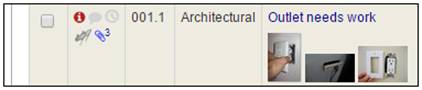
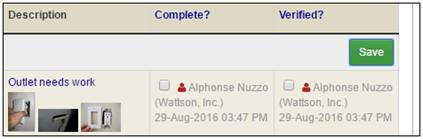
When photos are uploaded to an Action List item, they will appear as thumbnails in the log under the description of the item.
To view the full-size picture, just click the thumbnail. |
|
Linking Action List Items to Schedule Tasks
Multiple Action List items
can be linked to a single schedule task. Once the link has been
established, both the schedule task and the Action List item will
display a link |
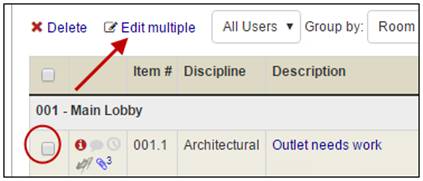
To link multiple Action List items to a Schedule: 1. From the Action List Log page, mark the check boxes for one or more items to be linked to a single Schedule task. 2. Then click the Edit Multiple link. |
|
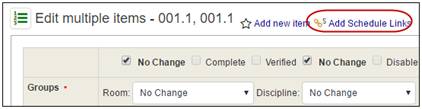
The Edit multiple items pop-up will display.
3. Click |
|
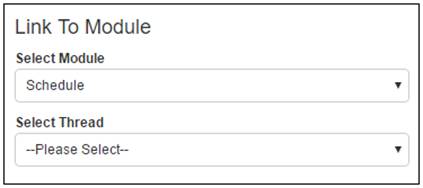
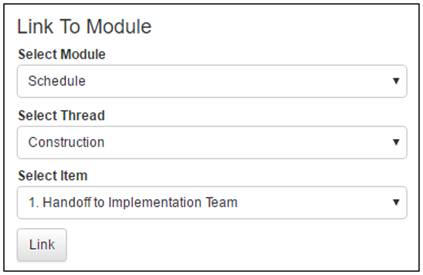
The Link To Module pop-up will display.
4. By default, the Schedule module has been selected for you. Choose the appropriate Schedule thread from the Select Thread drop-down list. |
|
The Select Item drop-down list will display.
5. Select the Schedule task to link to the Action List items. 6. Click the Link button to complete this process. |
|
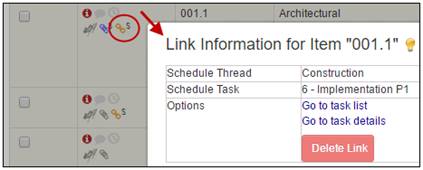
The Action List log will
display, showing the items that are now linked to the schedule
indicated by the link
You can click on this icon to view the associated schedule task information as well as the optional actions you can perform. |
|
Similar to linking multiple items to a Schedule, you can assign responsibility, due date, and reminders to multiple action items at the same time.
To edit one or more Action List items: 1. Mark the check boxes by the items you want to edit. 2. Then click the Edit Multiple link. |
|
Note: Editing multiple items will give each of those items the same components. Only change those fields, for example discipline, responsibility or due date, that you want to be the same for all of the items you selected.
3. Edit the fields you want to change. 4. Click the Save button to keep changes. |
|
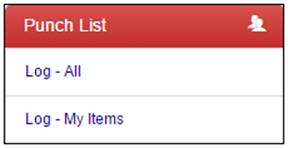
Action List offers two log views when you expand the thread of your choice: · Log – All: all action items. · Log – My Items: only items that are assigned to you. |
|
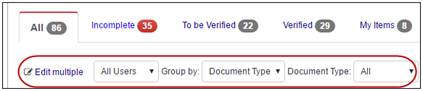
You can use any combination of log options, tabs, and filters above the Action List.
For example, if you wanted to view all of your tasks that are incomplete, you could select the Log – My Items, tab Incomplete and use the Document Type filter to show your incomplete tasks of a specific type in this list. |
|
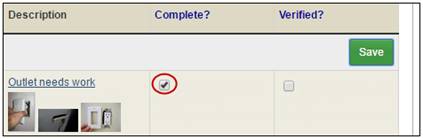
To update an item's status to complete: 1. Mark the check box in the Complete column for the item that is now complete. 2. Click the Save button. |
|
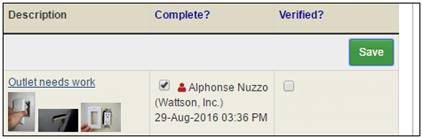
Your user name and the date/time when you updated this item will be captured and displayed under the completed check box, as shown in the diagram to the right. |
|
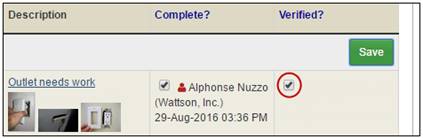
To update an item's status to verified: 1. Mark the check box in the Verified column. 2. Click the Save button. |
|
As before, your user name and the date/time when you updated this item is displayed under the verified check box. |
|
You can also roll back an item's status by deselecting the check boxes and clicking the Save button.
Your username and the date/time will appear under the check box, but will be grayed out, as shown in the diagram to the right. |
|
Add Comments, Time Spent, or Tags
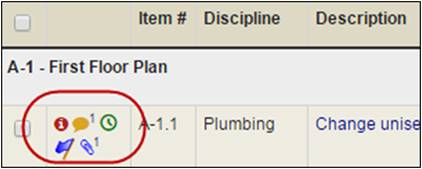
Additional information can
be added or viewed by clicking any of the |
|
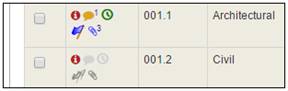
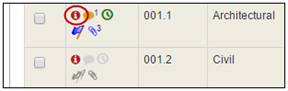
When there is no information
for these icons, they will display in gray.
However, if data does exist, the icons will
be in color. For instance, if comments have been left, the Comment
To add comments, time spent, or tags, click any one of the Comment, Time, or Flag icons. |
|
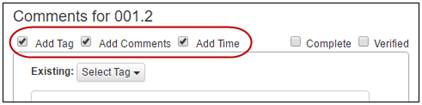
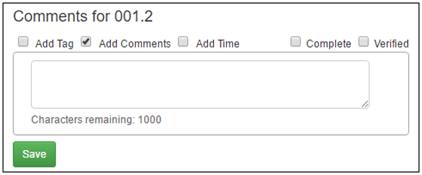
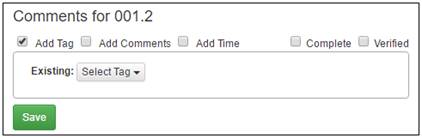
The Add Comments, Time or Flags pop-up will display.
You can select any combination thereof to add to this item, even marking it Complete and Verified, if you have rights to do so. |
|
As you select a check box for what you want to apply to this item, the field you need to enter the information will display. See what happens when you check to add comments in the diagram to the right. Note: If you use a flag that requires comments to be entered as well, you will be prompted to add comments before you can save. |
|
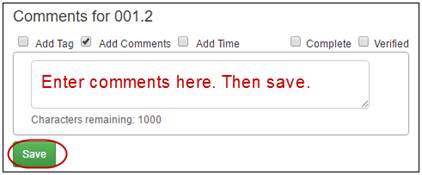
To add comments: 1. Click the Comment 2. Add your comment in the text box. 3. Click the Save button.
The entry will display in the Currently Showing section. |
|
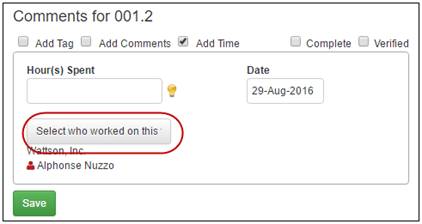
Adding Action List Time Tracking
To add Time Tracking to an item: 1. Click the Time Tracking 2. Add the hours spent in the appropriate format (For 15 minutes enter hours as 0:15 or 0.25. For 2 hours and 30 minutes enter hours as 2:30 or 2.50.) 3. Change the date or leave the current date default. Note: If the time spent working was performed by someone other than you, you can change the name associated with the time entry. |
|
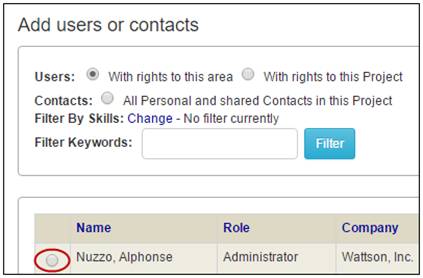
To enter time worked for a different person, add these steps: 4. Click the Select who worked on this button. 5. Select the contact or user that spent the time working.
The display will automatically go back to the Add Comments, Time, or Tags screen, with the person you selected listed as the Main Contact.
6. Click the Save button. |
|
To add Tags: 1. Choose a tag from the Select Tag drop-down. 2. Alternatively, select a tag from the Add New tag drop-down, and type a description for the custom tag. 3. Hit Save. |
|
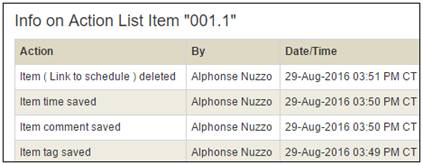
All actions taken in regards to Action List items are logged by the system.
You can view the history of the item by clicking
the Information
|
|
You will see a log like the one in the diagram to the right. |
|
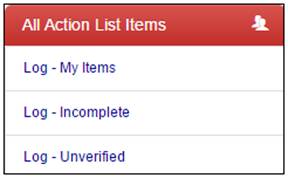
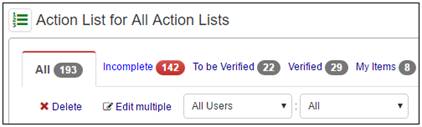
A roll-up list of all the action items is available under All Action Lists in the left-side menu.
Click any of the log view links under All Action Lists to view a log with combined information from all of the Action Lists within this project that you have access to view. |
|
You can use any of the sorting and filtering techniques described for other Action List logs, including the filters shown to the right. |
|