4. Projectmates Navigation
|
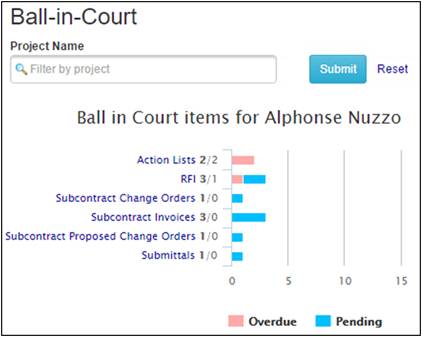
When you first log into Projectmates, the My Work tab will display.
You will see a list of modules for which you have tasks that require your attention, with red and/or blue bars out to the side.
The length of the bars indicates how many tasks you have for that module across all your projects.
Click the Refresh link to update this chart as needed.
To search for tasks for a particular project, use the search bar above the Ball in Court items chart.
To see the pending items for a particular module: 1. Click the name of the module. |
|
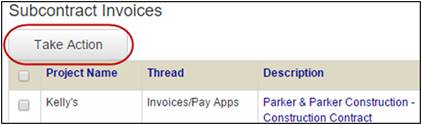
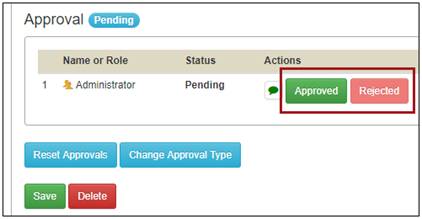
2. For items pending approval through the standard approval process, click the Take Action button.
3. The Approve and Reject options will display. |
|
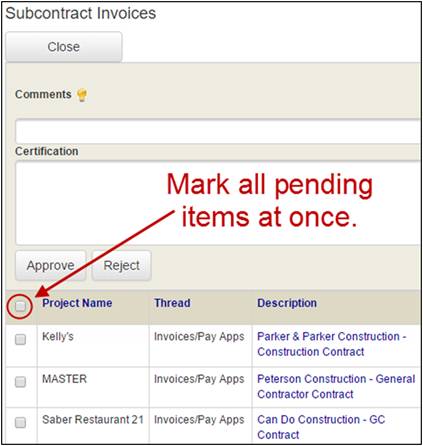
4. Mark items to be approved.
5. Optionally, enter any comments or certification information.
6. Click the Approve button.
To reject items, you would mark the items to be rejected and click the Reject button.
Note: This feature is available for any modules that use the standard approval process, including Budgets, Subcontracts/Contracts, PCOs, Change Orders, Purchase Orders and Invoices. |
|
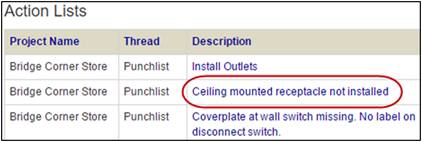
To open all other types of pending items, click the Description link for the item.
A pop-up will display with the item that will allow you to review and/or quickly take action to close the item or route to another user. |
|
The My Profile page allows you to update your personal information including name, address, email, username and password. It is important that this information is kept up to date, especially your email address, since this is how Projectmates will notify you of upcoming tasks or overdue items. |
To update general user information: 1. Update any of the fields as needed on the User Info tab. |
|
2. If you are updating your password, you must type the exact same password in the Password and Confirm Password fields. |
|
To edit your skills: 1. If any skills
that you possess are listed on the Skills
tab, click the 2. Click the Save button.
Note: Skills list are managed by Site Administrators and may not be applicable to all users. |
|
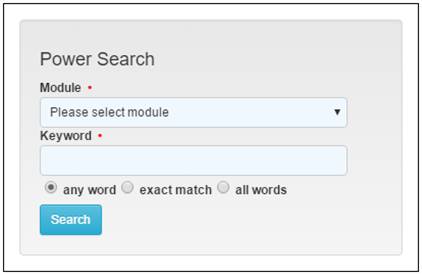
To access Global Search: 1. In the top right corner of the screen, click the Global Search link. The search options page will display. |
|
2. Select a module and enter a keyword. 3. Optionally, enter the project name. Note: To search in all projects, leave the Project Name field blank. 4. Choose from the three filter options: any words, exact match, or all words. 5. Click the Search button.
Note: Once your search results are populated, you can click the link to go directly to the item. |
|
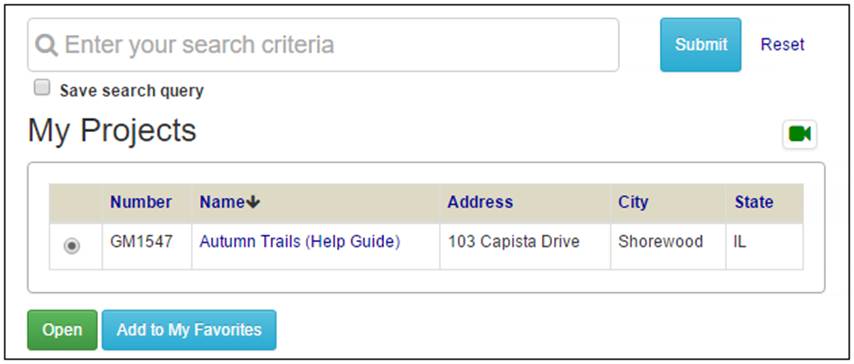
My Projects shows all active projects that the logged in user has access to. If you do not see a particular project that you feel you should have access to, please verify that you are using the correct log-in credentials. If you are, please check with the Administrator to find out why you do not have access.
|
To locate a project among your list of projects, you can sort the list of projects by clicking any of the column headers. They toggle for ascending/descending order.
You can also utilize the search feature by entering any text that corresponds to the project you are looking for that corresponds with any data in any column that displays on the My Projects page.
|
The Admin The Co-Admin If neither of these icons appear, then you are a non-administrative user of a project. |
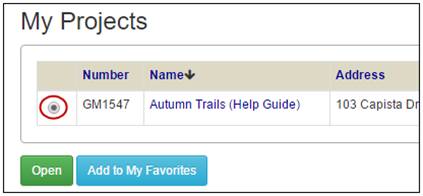
To open a project: 1. Select the radio button for the project. 2. Then click the Open button
Alternatively, click the project name. |
|
The Project Search can be filtered by words in the project name or any displayed fields. To store the search criteria, mark the check box for Save search query. |
|
Executive summary reports provide a single-page project summary with critical vitals so you can quickly get the pulse of a project without having to navigate into the project itself. Each report pulls information from inside a project, such as budget, schedule, and construction workflow status. Access rights to the information in the summary are consistent with the access rights a person is given inside the project itself. |
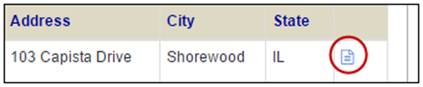
To view executive summary
reports, click the Report
The Executive Report will display. |
|
The Project Request page allows users to request a new project. Project requests must be approved before being used to create a new project in Projectmates. |
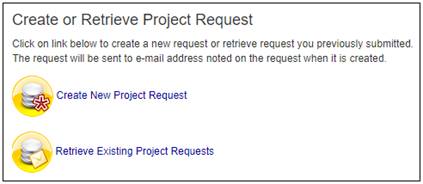
Non-Projectmates users can enter a project request by going to the appropriate URL (https://servername/ Projectmates/ProjectRequest/Index.aspx) and selecting the Create new Project Request link.
Non-Projectmates users can also retrieve previously entered requests by selecting the Retrieve existing Project Requests link. |
|
To retrieve existing project requests if you are a non-Projectmates user: 1. Click the Retrieve Existing Project Requests link.
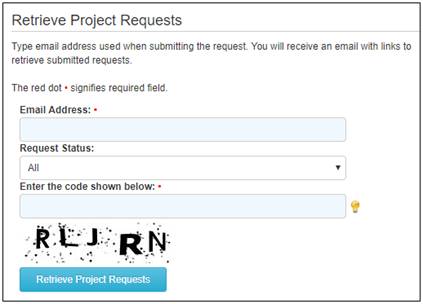
The Retrieve Project Requests pop-up will display.
2. Enter the email address that was used when creating the original request. 3. Optionally, you can specify that only project requests with a particular status such as approved or pending be retrieved. 4. Enter the verification code that is on the screen. 5. Click Retrieve Project Requests button.
An email will be sent with links to the submitted project requests. |
|
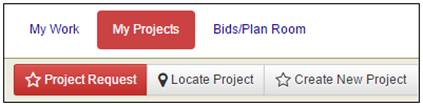
To access the Project Request log, click the Project Request button.
The project request log displays all project requests and their status. |
|
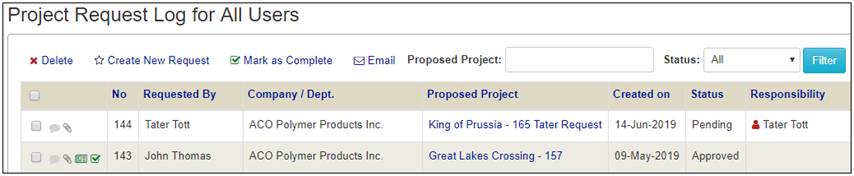
· To view, edit, or approve an existing project request, click the name of the project.
|
· To mark a project request as complete or delete it: 1. Mark the check box for the project request item. 2. Click the · To
send an email update for all project requests added by a specific
email address to the given email address, · To filter the log for a particular project name, enter the name in the Proposed Project field and click Filter. · To filter the log for a particular status, use the Status drop-down menu to select it and click Filter. · To
view/edit comments, click the Comment
· To
view/edit files, click the File
· To
navigate directly to the project created from the project request
item, click the |
To request a new project: 1. Click the Create New Request link. 2. Complete the required fields. |
|
3. Select Approval Type, if applicable. 4. Click the Save and Submit button. If desired, use the links at the top to view or add file attachments or comments to the request. |
|
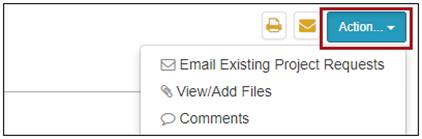
If desired, use the Actions… drop-down in the top-right corner of the screen to access the links to send as an email, to view or add file attachments or comments to the request. Note: The Project Request Administrators will be notified and can approve or decline the request. |
|
To Approve or Decline a Request: (For Project Request Admins Only) 1. In the project request form go to the Approve tab. 2. Optionally, click
the Comment 3. Select Approved or Rejected. Note: Once a request is Approved, the option to Create a New Project is available. |
|
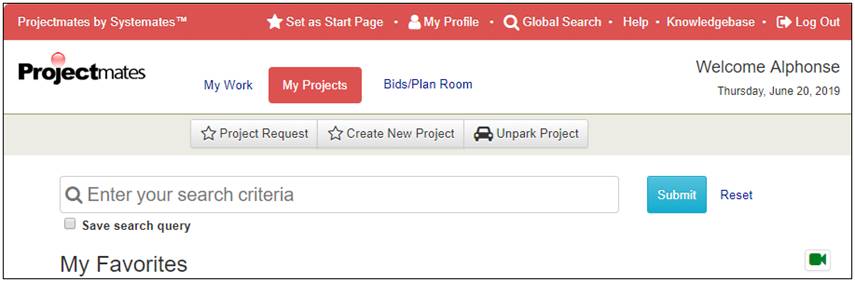
Upon entering a project, the project home page will display. To easily navigate and work within the project, you will want a basic understanding of the layout of this page. |
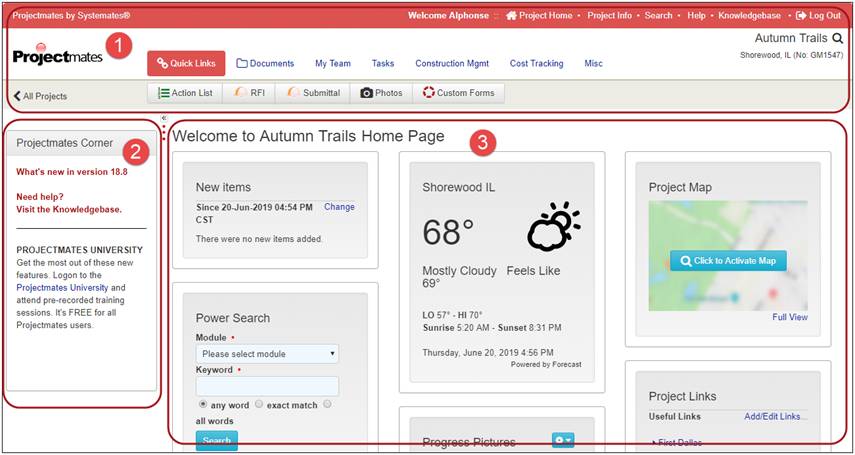
The webpage has three major areas: Navigation, Left-Side Menu, and Workspace. 1. Navigation Pane · Contains the main menus for navigation. · Red/white tabs show the main options. · Each tab has different buttons under it. |
2. Left-Side Menu Section · Contains the Projectmates Corner, where you find important news · Inside a module, such as document management, this is where you will access the different folders for that module. · The three red dots toggle to collapse or un-collapse the left-side menu. · Click and drag the area below the three red dots to re-size the left-side menu width.
3. Workspace Section · Contains New Items, Team Notes, and Progress Pictures applets as well as any other applets set up for your site. Note: Nearly everything from the tab titles to the icons under each tab is configured and maintained at the site level, so the actual configuration that you see in Projectmates may be a little different than the example above. |
The navigation pane of your project will display the project tool bar. These tabs and buttons will help you to quickly access features with the Projectmates application. Remember that some of these options may not display on your tool bar based on your security level. In addition, the site administrator can remove icons, change the description and/or modify the order for these icons. |

1. Logged-in User's Name |
2. Home Page link |
3. Project Information Page link |
4. Project Power Search link |
5. Navigate to Projectmates Help Guide link |
6. Navigate to Projectmates Support Portal link |
7. Log Out |
8. Project Navigation Tabs |
9. Project Name |
10. Leapfrog icon |
11. Project Location and Project Number |
12. Back to My Projects Page link |
13. Project Navigation Buttons |
|
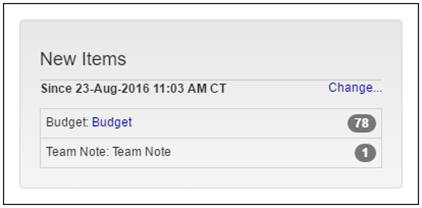
This section lists any new activity that has taken place since your last log-in.
To specify a date: 1. Click the Change… link. 2. Enter the new date. 3. Click the Go button. |
|
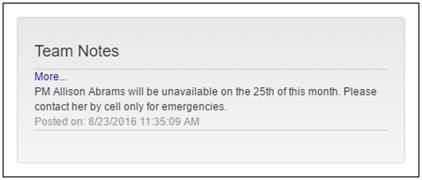
This section lists any project related updates, like a project specific bulletin board.
To see previous messages, click the More… link. |
|
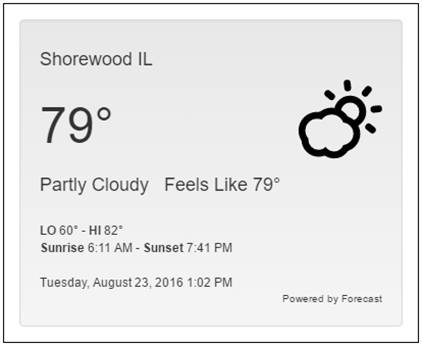
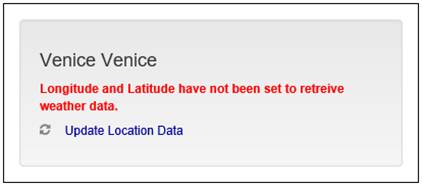
Current weather at the project site will be displayed based on the latitude and longitude of the project. |
|
If the longitude and latitude are not entered or the longitude and latitude are not found, user will get a message: Longitude and Latitude have not been set to retrieve weather data.
To set the longitude and latitude, click the
|
|
This section allows users to view the most recent images that have been uploaded into Projectmates' Photo Album module as well as a Latest Project Picture. By default, no pictures are uploaded. |
To add a Latest Project Picture: (For Project Admins Only) 1. Use the 2. Click the Browse button to upload a picture file from your hard drive. You can upload a project picture in any graphic file format such as JPG, BMP, TIFF, etc. 3. Optionally, a picture caption can be entered. This will replace the default title Latest Project Picture. 4. Click the Save button.
The image is now displayed on the project home page. Note: You can enlarge any image by clicking it. |
|
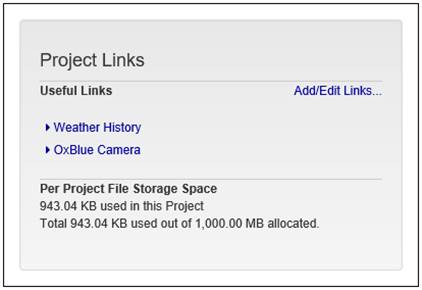
Useful links and file storage space information is displayed in the Project Links section.
To add a link: (For Admins Only) 1. Click Add/Edit Links… |
|
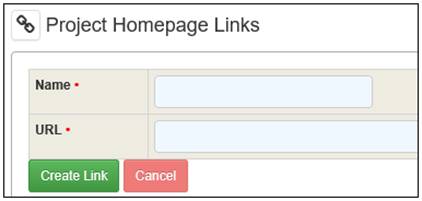
2. Enter the display name and the URL address for the new link. 3. Click the Create Link button. |
|
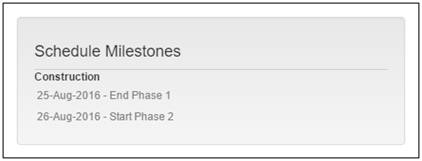
Any incomplete Schedule Milestones coming up in the next 30 days will be shown in this section.
To view the details of a task, click the name of the task. |
|
Initially, the map displays with a button to activate the map. Once this button is clicked, the map will display according to the latitude and longitude coordinates on the Project Info page.
The project's location is displayed with a red icon.
To view a larger image of the map, click the Full View link.
To zoom in or out on the map, hold Ctrl and scroll. |
|
If the longitude and latitude are not entered or the longitude and latitude are not found, user will get a message: No location data found.
To set the longitude and latitude, click the
Note: This will only have to be done one time. |
|
Any information stored within a project can be found through Projectmates' search tool. |
At the bottom of the project home page, users can perform a quick search to find items within that project.
To conduct a search within the current project: 1. Use the drop-down box to select which module you want to search. 2. Enter the keyword or phrase for which you are searching. 3. Click the Search button. |
|
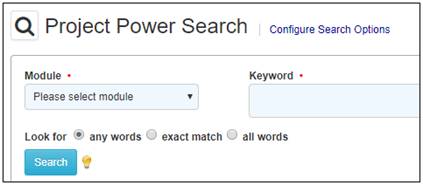
For more search options, a user can use Project Power Search. 1. Click the Search link to access the Project Power Search feature. |
|
2. Use the drop-down box to select which module you want to search. 3. Enter the keyword or phrase for which you are searching. 4. Optionally, select the search criteria setting of your choice: any words, exact match, or all words. 5. Click the Search button.
Results will be displayed including a link to view the resulting item. |
|
The user information in My Profile is utilized throughout the Projectmates system. For instance, when Projectmates sends email notifications, it uses the name and email address stored in My Profile. |
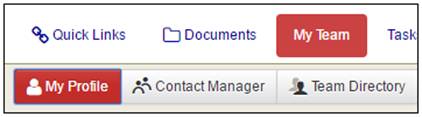
To update the information in My Profile: 1. Click the My Team tab. 2. Select the
Alternatively, you can click on your name where it says Welcome and your name in the red bar at the top of the screen. |
|
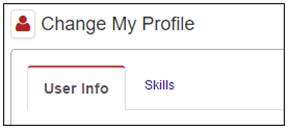
The user profile information is divided into several tabs of information.
To modify any profile information: 1. Change the desired information. 2. Click the Save button. |
|
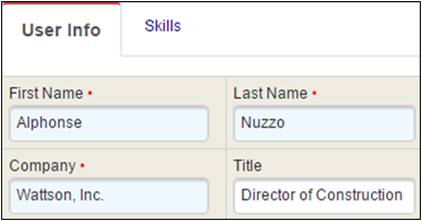
User Info tab
This screen contains general user information such as contact information and login information.
When updating your user profile information, blue fields marked with red dot are required.
Username must be at least 3 characters.
Password must be at least 8 characters, with at least 1 capital and 1 lower case letter, at least 1 number, and at least 1 symbol, like !@#$%^&*().
(Admin's Only) To use vendor information that is already saved in Projectmates: 1. Click the Associate Company link. 2. Select the appropriate company. 3. Click the Save button to keep any changes. |
|
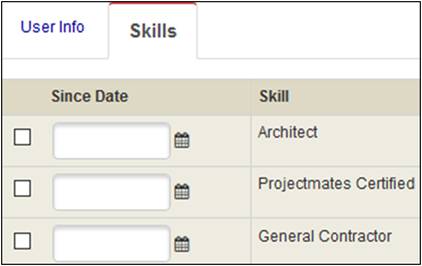
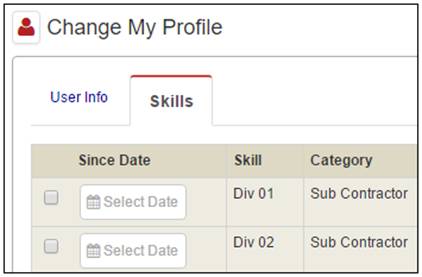
Skills tab
To specify when a skill was obtained, click in the date field.
A calendar selection pop-up will display so that you can select the date.
To remove a skill, unmark the check box to the left of the skill.
Click the Save button to keep any changes. Note: Skills are pre-defined by the Site Administrator. |
|
Site Administrators can change the look and feel of Projectmates. Customizations may include changing the navigation menu names, icons and locations within a project.
The images in this documentation utilize the default view of Projectmates. Therefore, references to certain menus and buttons may be located elsewhere or not available.
Note: Contact your Site Administrator if you are unable to find certain modules specified in this documentation. |